
How to install stair railings in the UK: A homeowner’s guide
Right, let’s get your stair railing project off to a flying start. Before you even think about picking up a […]

Right, let’s get your stair railing project off to a flying start. Before you even think about picking up a […]
Right, let’s get your stair railing project off to a flying start. Before you even think about picking up a drill, a bit of proper planning is essential. Getting this groundwork right is easily the most critical phase of the entire job, and it’s what separates a professional, rock-solid installation from a wobbly disaster.
Embarking on a stair railing installation is an exciting way to completely change the look and feel of your home. But jumping straight in with the tools is a classic mistake. A successful outcome hinges on careful preparation. Think of this stage as creating your blueprint; it makes every step that follows more accurate, safer, and far less stressful.
Taking the time now prevents costly errors down the line and ensures your new balustrade not only looks fantastic but is also structurally sound and completely safe.

This initial phase is about more than just grabbing a tape measure. It’s about getting to know the anatomy of your staircase and making smart choices on materials that suit your home’s style and your family’s needs.
Before you measure anything, you need to know the lingo. Getting these terms right will make following any guide—or talking to a professional like us—much easier.
Understanding how these parts fit together is the first step in visualising your project and figuring out exactly what you need to buy or replace.
The materials you choose will define the look, feel, and future maintenance of your new staircase. Here in the UK, we’re seeing a huge shift towards modern, light-enhancing designs.
This trend is backed by real numbers—the UK balustrade market is projected to grow by 4.6% annually between 2020 and 2026. This is driven by a love for contemporary materials like glass and stainless steel in both new builds and renovations.
Here’s a quick rundown of the most popular options:
A crucial tip from experience: Always order a little more material than your measurements suggest. Having an extra spindle or another length of handrail can save you from a frustrating trip back to the supplier if you make a mis-cut. Trust me, it happens.
Before you finalise any plans or buy any materials, there are a couple of vital checks you must do.
First, assess the structural integrity of your existing staircase. If you plan on reusing the old newel posts, give them a good shake. Are they completely solid and free from wobble? If not, they’ll need reinforcing or replacing.
Next, have a good look for any potential obstructions. Check for light switches, plug sockets, radiators, or even windows that might get in the way of where your handrail needs to go. Spotting these issues now will save you a massive headache later and ensures your project gets started on a solid footing.
When you install a new stair railing, you’re doing more than just giving your home a fresh look—you’re taking direct responsibility for the safety of every single person who uses those stairs. Understanding UK building regulations isn’t about getting bogged down in legal jargon; it’s about applying common-sense safety rules to protect your family and visitors.
Think of these regulations less as a hurdle and more as a professional’s checklist for getting the job done right. The key document you need to know about is Approved Document K. This sets out the absolute minimum safety standards your new balustrade must meet. Ignoring these can lead to serious hazards and create headaches if you ever decide to sell your home.
Let’s break down the essential rules that you absolutely must stick to for any domestic staircase project in the UK. Get these right, and you’re well on your way to a fully compliant installation.
A classic mistake we see is people getting lost in the aesthetics and completely overlooking these fundamental safety points. A beautiful railing that isn’t safe is a failed project. Always double-check your gaps and give the finished structure a firm test to check for any wobble or weakness.
Glass balustrades look fantastic and bring a modern, open feel to a space, but they have their own set of safety requirements. The type of glass you choose is absolutely critical.
You can’t just use any old glass. Standard annealed glass, like you’d find in old windows, is completely unsafe and illegal for use in a balustrade. You must use safety glass, which means either toughened or laminated glass. It’s worth understanding laminated and toughened glass options to see which is right for your project. This ensures that if a panel were to break, it would do so in a way that minimises the risk of serious injury.
While Approved Document K covers the specifics for your installation, it’s helpful to see where it fits into the broader UK context. Safe stairways are a huge part of national accessibility and independent living initiatives. For instance, the UK is a European leader in the stair lift market, a sector supported by VAT relief and Disabled Facilities Grants of up to £30,000 for those who qualify. This shows just how seriously stairway safety is taken.
Homeowners and installers should also be aware of wider laws like the Building Safety Act 2022, which has raised the bar for building safety and compliance across the board. Your railing project might feel small, but it’s part of this larger effort to make UK homes safer for everyone. Following the rules ensures you’re doing your part.
With your measurements double-checked and all your materials on site, it’s time to bring your vision to life. This is where the planning pays off and you start to see your new staircase take shape.
The secret to a professional-looking and, more importantly, a safe installation is to be methodical. Check your alignments at every single stage and resist the urge to rush. It’s best to see it as a series of smaller, manageable tasks that will come together to create a solid and stylish final product.
First things first: prepare your workspace. Get everything out of the way—clear the staircase and the surrounding area of furniture, rugs, or any other obstacles. A clean, uncluttered space is a safe space. It lets you move around freely and lay out your tools and components without hassle. Don’t forget to put down dust sheets to protect your flooring from scratches and debris, which is a must if you’re drilling or cutting timber.
The infographic below really nails the core safety principles that should guide every step you take, from setting the height to guaranteeing the final structural strength.
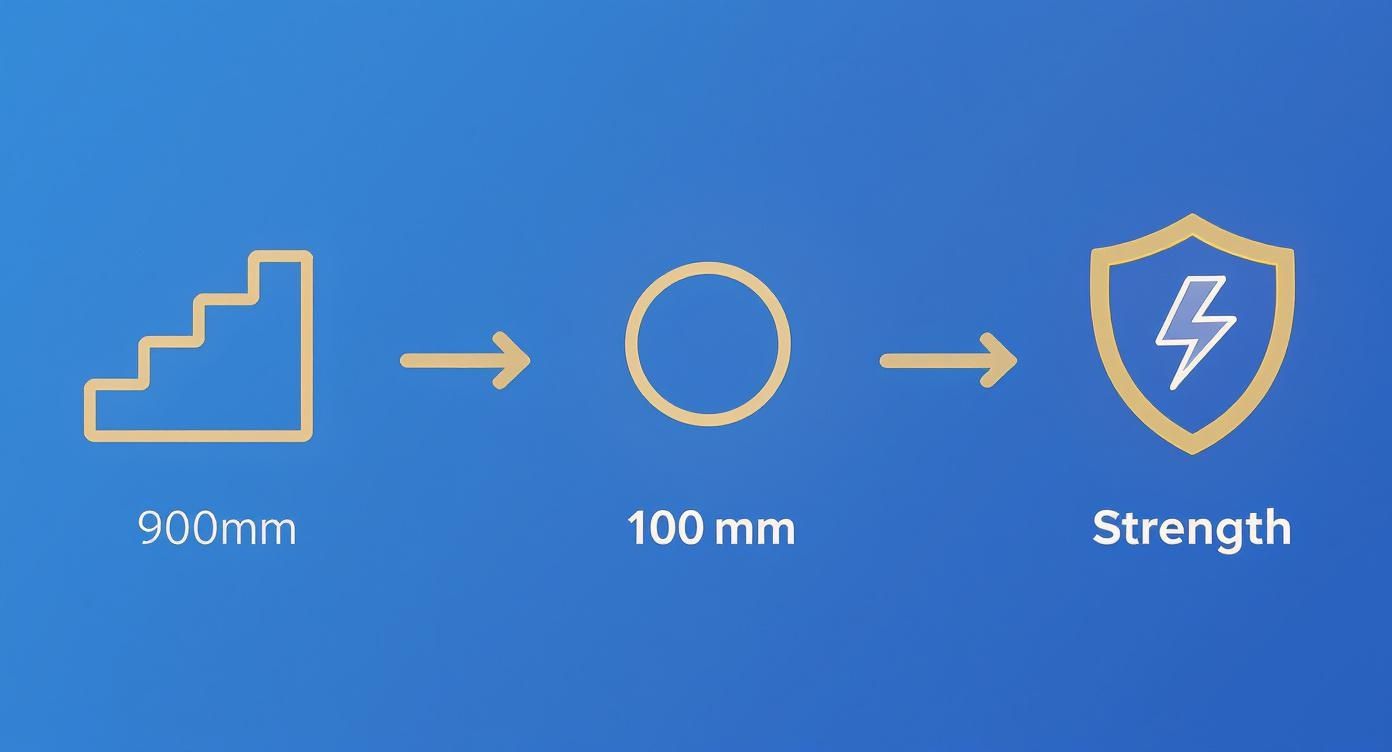
This visual is a great reminder of the non-negotiables: the process always starts with the mandatory 900mm height, narrows down to the crucial 100mm sphere rule for gaps, and must always result in a railing system that’s fundamentally strong and secure.
Think of your newel posts as the bedrock of the entire balustrade. If these aren’t rock-solid, nothing else stands a chance. Their job is to provide the main structural support and absorb any force that gets put on the handrail. Getting this step absolutely right is non-negotiable.
Start by marking the exact spot for your newel posts at the top and bottom of the staircase. For a bottom post, this will typically be on the first step or the floor right at the base. The top post is usually fixed directly to the landing. Grab a spirit level and a square to make sure your markings are perfectly vertical and properly aligned with the edge of the stairs.
How you fix them in place really depends on what’s under your floor.
Once the post is in position, check it with your spirit level on at least two adjacent sides to confirm it’s perfectly plumb before you tighten the fixings all the way. A wobbly newel post is a failed installation, full stop. Give it a firm shake to test its stability before you even think about moving on.
With the newel posts standing firm, you can now start filling in the main body of your balustrade. This is the stage where the character of your staircase really starts to shine through. Whether you’re using traditional timber spindles or sleek glass panels, the principles of accurate measurement and a secure fit are just as important.
For timber or metal spindles, you’ll first need to fix a base rail to the stringer (the angled board running up the side of your stairs) and a handrail between the newel posts. These usually come with pre-machined grooves to hold the spindles neatly. Measure the distance between the top of the base rail and the bottom of the handrail for each individual spindle position—don’t assume they’ll all be identical, as slight variations are common.
Cut each spindle to size, making sure you get the angle right at the top and bottom to match the slope of the staircase. A sliding mitre saw is your best tool for this, as it gives you precise, repeatable angled cuts every time. Fit the spindles into the grooves, using wood glue and small pins or screws to lock them in place. Crucially, use spacers to maintain that all-important sub-100mm gap.
If you’re working with glass, the approach is a bit different. Glass panels are usually held in place with clamps fixed to the newel posts, or sometimes with a channel system that runs along the base. Precision here is everything; you have to ensure your clamps are perfectly aligned and level before you even think about securing the glass.
The handrail is the final structural piece of the puzzle and the part of the balustrade you’ll interact with every day. It has to be fitted securely between the newel posts to provide a continuous and stable guide from the bottom of the stairs to the top.
Start by measuring the distance between your newel posts at the required height (a minimum of 900mm from the pitch line). Mark this length on your handrail. To get it to sit flush against the vertical faces of the newel posts, you’ll need to make angled cuts at each end that match the pitch of your stairs.
Again, a mitre saw is your best friend for getting these angles spot on. A poorly cut angle will leave an ugly gap and, more seriously, will compromise the strength of the joint. A good tip is to cut the rail a tiny bit longer at first, then shave off small amounts until you get a perfect, snug fit.
Once you have a tight fit, you can secure the handrail. There are a few ways to do this:
Whichever method you choose, make sure the connection is completely rigid. Any movement or play in the handrail is a red flag that the fixings need tightening or rethinking. This final connection ties the whole structure together, transferring any load on the rail back to those securely anchored newel posts. Your new railing is now installed, ready for any final finishing touches.
Before diving into any stair railing project, the first step is always getting a firm handle on the costs involved. A clear budget is your best friend here—it helps you decide on materials and labour without any nasty surprises cropping up later on. Let’s break down the typical expenses, which really fall into two main camps: the materials you choose and the price of getting it professionally installed.
The materials you pick will be the single biggest factor in your budget. It’s a decision that shapes the final look, how long it will last, and the overall cost. For example, a simple pine handrail is a perfectly good, cost-effective solution. At the other end of the scale, a premium system with toughened glass and sleek stainless steel fittings represents a much more significant investment.
To help you budget, it’s useful to see how different materials stack up against each other. This table gives a rough estimate of what you can expect to pay for materials alone, giving you a clearer picture of where your money will go.
| Material Type | Average Cost per Metre (Materials Only) | Key Benefits |
|---|---|---|
| Pine | £25 – £50 | Affordable, easy to paint or stain, classic look |
| Oak | £60 – £120 | Highly durable, premium finish, timeless appeal |
| Stainless Steel | £100 – £200 | Modern, low maintenance, corrosion-resistant |
| Glass Panels | £150 – £300+ | Maximises light, creates a sense of space, high-end aesthetic |
Keep in mind these are just ballpark figures. The final cost will depend on the specific system, finish, and thickness of the materials you choose.
Your project’s price tag isn’t just about the parts you buy. Unless you’re a seasoned DIYer ready to tackle the entire job yourself, labour is a major factor to consider. Here in the North of England, installation rates can vary depending on your exact location and just how tricky your staircase is—a winding staircase with several turns will naturally demand more time and skill than a simple straight run.
So, what should you expect to pay? Looking at UK industry averages, installing a basic new handrail typically costs around £145. This figure shifts with materials, of course. A chrome handrail might set you back between £76 and £141, while stainless steel is a step up, usually ranging from £190 to £255.
A good installer will generally charge between £20 to £35 per hour, with a straightforward job taking 2 to 3 hours. For more ambitious projects, like a full balustrade replacement on a complex staircase, the costs can climb significantly, sometimes landing between £2,300 and £3,500 once you account for the extra labour and high-spec materials.
One of the most common budgeting mistakes we see is people forgetting the little things. Always remember to account for fixings, adhesives, fillers, and any paint or stain you’ll need for the finishing touches. These can easily add an extra 10-15% to your material budget.
If you’re planning to install it yourself, you can definitely save a chunk of money on labour. But first, you need to be honest about your toolkit. While you might have the basics covered, a professional-grade installation often demands some more specialised gear you might not have lying around.
Think about these potential tool expenses:
Investing in the right tools isn’t just a suggestion; it’s crucial for a safe and polished finish. Skimping here is a false economy that can lead to poor fits, wobbly components, and a result that just looks amateur.
Trying to budget can feel like a bit of a guessing game, but it doesn’t have to be. For a precise and immediate idea of what your dream balustrade will cost, our online Balustrade Calculator is the perfect place to start. We designed it to give you a detailed, custom quote in just a few clicks.
You can pick your preferred balustrade style, choose between toughened or laminated glass, and select a top rail. Just pop in your measurements, and the calculator will generate a clear cost breakdown, empowering you to plan your budget with total confidence.
You’ve done the heavy lifting, and your new railing is securely in place. Now for the details—those small but crucial final touches that take your project from simply functional to professionally finished. This last stage is all about locking in long-term safety and achieving that flawless, polished look that makes all the effort worthwhile.
Before you even think about putting your tools away, a thorough safety check is absolutely essential. This isn’t just a quick glance; it’s a systematic test of every single component you’ve just installed.
The main goal here is simple: identify and eliminate any movement, weakness, or instability. A properly installed railing should feel like a single, solid unit, as if it were part of the house itself.
Start by giving the entire structure a firm push-and-pull test. Grab the handrail at various points—at the top, the bottom, and right in the middle—and give it a good shake from side to side and up and down. There should be absolutely no wobble or give. None.
Next, apply firm pressure to individual balusters or glass panels. Do they feel secure in their fittings? Go back and check your newel posts one last time to confirm they are rock-solid and haven’t worked loose during the rest of the installation.
This stability check is non-negotiable. If you feel even the slightest bit of movement, stop what you’re doing and investigate immediately. It nearly always points to a loose fixing that needs tightening or a joint that needs reinforcement.
With safety confirmed, you can now focus on the cosmetic details that create that clean, professional finish. These steps are all about hiding the evidence of your hard work and protecting the materials for years to come.
These final actions are what truly complete the job, making your new stair railing look like it was installed by a seasoned pro.
If you opted for a modern glass balustrade, the final touches look a little different. Your main task is giving the glass a thorough clean to remove fingerprints, dust, and any smudges left from the installation. A dedicated glass cleaner and a microfibre cloth will give you that perfect, streak-free shine. It’s also a great idea to do one last check of all the glass clamps and hardware, ensuring every bolt is securely tightened.
While tackling a DIY railing installation can feel like a rewarding weekend project, the precision and safety involved mean hiring a professional is often the smarter, safer bet. When it comes to stair railings, there’s absolutely no margin for error. A pro ensures every component is secure, every angle is perfect, and every regulation is met, giving you total peace of mind.
For homeowners across the North of England—from the busy centres of Leeds and Hull to the gorgeous landscapes of Cumbria—finding the right tradesperson is everything. An expert installer doesn’t just fit a product; they bring years of experience, specialist tools, and a deep understanding of how to get that flawless, durable finish that DIY efforts can rarely touch.
Hiring an expert brings real-world benefits that go far beyond just saving you a bit of time and effort. A professional installation is a direct investment in the quality and safety of your home.
Here’s what a seasoned installer brings to the table:
The real value of a professional lies in their ability to see and solve problems you might not even notice. Whether it’s a slightly uneven floor or a tricky staircase angle, they have the know-how to adapt and deliver a perfect result, no matter what.
Finding a reliable tradesperson takes a little homework, but it’s time well spent. The principles are similar no matter the trade; you can find some great general advice in guides on how to find a good plumber in the UK you can trust.
When you start contacting potential installers, have a few key questions ready:
A confident, experienced professional will be happy to provide all this. Pay close attention to how they communicate—are they clear, responsive, and do they sound like they know their stuff?
Here at Binks Glass Solutions, we’ve built our reputation on exceptional craftsmanship and a deep understanding of modern balustrade systems. Serving Harrogate, York, and the wider Northern England region, our team specialises in creating safe, stylish, and fully compliant installations that completely transform homes. We get the nuances of working with materials like glass and steel, ensuring every single project meets our exacting standards.
Choosing the right installer is a huge decision. For a deeper look into what really sets a true expert apart from the rest, you can learn more about the three things a balustrade with glass installer needs to excel at. By investing in a specialist, you aren’t just buying a product; you’re ensuring your new staircase is a safe, beautiful, and lasting feature in your home.
As you start to finalise the plans for your new staircase, it’s completely normal for a few last-minute questions to pop up. We’ve pulled together some of the most common queries we hear from homeowners across the North of England, giving you clear, straightforward answers to help you feel confident about your installation.
This really comes down to the complexity of the job. A simple, straightforward project—say, replacing a handrail on a straight flight of stairs—could be wrapped up by a professional in just a few hours.
However, a full balustrade replacement with timber spindles on a standard staircase is more likely to take a full day. If your vision includes more intricate elements like custom glass panels, bespoke metalwork, or navigating a tricky winding staircase, you should probably plan for it to take two or more days. This gives the installer the time needed to get a precise, secure, and flawless finish. Always ask your installer for a specific time estimate before they start.
In many cases, yes—and it can be a great way to save a bit of time and money. If your current newel posts are structurally sound, free from any rot or damage, and already in the right position for the new system, they can often be kept. This is a popular option for people who just want to update the look by swapping out the handrail and balusters.
Before you commit to this, it’s absolutely vital to have them inspected properly. A professional will check their stability to confirm they can safely anchor your new balustrade. A wobbly newel post is a complete non-starter and will have to be replaced.
When you’ve got little ones running around, safety is rightly the number one priority. Toughened or laminated glass panels are a fantastic choice because they create a solid, climb-proof barrier with no gaps for small children to get stuck in.
If you prefer a more traditional look with spindles, the golden rule is to ensure the gap between them is no wider than 100mm, as required by UK regulations. It’s also wise to choose materials that are smooth to the touch, with no sharp edges or splinters that could cause an injury.
Ready to get a clear, no-obligation quote for your project? The team at Binks Glass Solutions is here to provide expert advice and guidance for homeowners across Yorkshire and the North of England. Contact us today to discuss your ideas and see how we can help.