
Repairing a Staircase Your Complete DIY Guide
That annoying squeak, the slight wobble in the handrail, a step that feels a little spongy underfoot – these are […]

That annoying squeak, the slight wobble in the handrail, a step that feels a little spongy underfoot – these are […]
That annoying squeak, the slight wobble in the handrail, a step that feels a little spongy underfoot – these are the early warning signs that your staircase needs attention. Before you even think about picking up a tool, the first and most crucial job is a bit of detective work.
Pinpointing the exact source of the problem is the only way to ensure you’re applying a proper, lasting fix rather than a quick patch-up. This initial inspection will save you a world of time and frustration down the line.
A staircase looks simple enough, but it’s actually a cleverly engineered system of interconnected parts. When one component starts to fail, it inevitably puts extra stress on others, often leading to a chain reaction of issues. That’s why a methodical inspection is so important.
Your best bet is to start at the bottom and work your way up, testing every single element as you go.
First, simply walk up and down the stairs slowly. Tune in your senses. Listen for every creak and groan, and feel for any give or movement beneath your feet. Don’t just stick to the middle of the treads; make sure you test the edges, as this is often where trouble first reveals itself.
A great tip is to use small pieces of masking tape to mark every single spot that feels or sounds off. By the end, you’ll have a clear visual map of all the problem areas.
Next, grab a family member or friend and have them walk up and down while you watch from the side and, if you can, from underneath. Seeing how the different parts move and interact under a load is often the “aha!” moment. A squeak is just the sound of two components rubbing together – your job is to discover which two.
With a general idea of the problem spots, it’s time to zoom in on each part of the staircase individually. This detailed check ensures you don’t miss any underlying issues that could affect the structure’s safety.
The material of your staircase will have its own unique checklist. For traditional wooden stairs, so common in homes across Yorkshire, the environment plays a big part. Be on the lookout for the early signs of wood rot or insect damage, particularly if the staircase is against an external wall or near a damp cellar. A simple trick is to gently probe any soft or discoloured spots with a screwdriver.
If you have a more modern staircase with a glass balustrade, your focus will be different. Check that every single clamp and fitting holding the glass panels is completely tight. When you gently push on the glass, there should be zero movement or rattling. Carefully inspect the panels for any chips or cracks, paying close attention to the edges and corners where damage often starts. Any compromise to a glass panel is serious and needs immediate attention.
By taking the time to do a thorough diagnosis, you get past simply treating the symptoms. You’re finding the root cause, which is the only route to a safe, permanent repair. This is without a doubt the most critical step in the entire process.
Trying to fix a staircase with the wrong gear is a bit like attempting a Sunday roast with just a butter knife. It’s frustrating, messy, and you’re never going to get the result you want. Having the right tools and materials laid out before you even start is what separates a satisfying weekend project from an absolute headache. Whether you’ve got a fully kitted-out workshop in Harrogate or just a basic toolbox in Leeds, let’s get you sorted.
First thing’s first: clear the area. A tidy workspace isn’t just about being organised; it’s a basic safety rule when you’re working on the main artery of your home.
For almost any staircase job, from silencing a nagging squeak to firming up a loose tread, you’ll need a core set of tools. Consider these the foundation of your repair kit.
A common mistake I see is people relying solely on screws. They provide the initial mechanical fix, sure, but it’s the combination of glue and clamps that creates the silent, solid, long-lasting joint that stops squeaks and wobbles for good.
When you move beyond simple fixes, your toolkit will need to grow a little. These are the bits and pieces for jobs like replacing a broken baluster, patching up a cracked riser, or fitting reinforcing blocks under the treads. Having them ready means you won’t be forced into a mid-job dash to the hardware shop.
A hand saw, or even better, a Japanese pull saw, gives you incredible accuracy for clean, precise cuts – vital if you’re shaping new timber to fit. You’ll also find a hammer and a nail punch indispensable for tapping in finish nails and then setting them just below the wood’s surface for a professional, tidy look. And for achieving that perfect, seamless finish after a repair, nothing beats a good set of sharp wood chisels and a block plane for trimming and shaping.
To help you get organised, here’s a quick checklist of what you’ll need for some of the most common staircase problems.
| Staircase Problem | Essential Tools | Required Materials |
|---|---|---|
| Squeaky Treads/Risers | Drill Driver, Clamps, Hammer, Nail Punch | High-Quality PVA Wood Glue, Wood Screws, Finish Nails, Wood Filler |
| Loose Handrail/Balusters | Drill Driver, Wood Chisels, Socket Set (for bolts) | Strong Wood Glue, New Screws/Bolts, Two-Part Wood Filler |
| Cracked Wooden Components | Drill Driver, Clamps, Hand Saw/Pull Saw | PVA Wood Glue, Wood Screws, Wood Filler, Reinforcing Wood Blocks |
| Damaged Glass Balustrade Panel | Specialist Glass Lifting Suction Cups, Glazing Tools | (Specialist Job) – Requires replacement toughened/laminated safety glass |
Having these items on hand will equip you for most situations, but always assess your specific repair before you begin to make sure you haven’t missed anything.
The materials you pick are every bit as important as the tools you wield. Using the wrong filler or a weak adhesive won’t just look bad; it can seriously compromise the safety and integrity of your staircase.
For filling gaps, old nail holes, or small cracks, a two-part wood filler is your best bet. It sets rock hard and can be sanded, stained, or painted to blend in perfectly. When you’re dealing with bigger structural elements like a railing on a wall, you absolutely must use fixings appropriate for the wall itself, whether that’s plasterboard, brick, or blockwork. To get a deeper understanding of that specific job, have a look at our detailed guide on how to install stair railings. For repairs that need a powerful, gap-filling bond, I’d recommend a polyurethane-based adhesive. It expands slightly as it cures, forcing its way into every tiny gap to create an incredibly tight joint.
Right, with your tools laid out, it’s time to get stuck in. This is where we stop talking and start doing, focusing on the techniques that deliver a proper, lasting staircase repair. We’ll tackle the most common headaches homeowners face, from those infuriating squeaks to wobbly balustrades, giving you the practical methods needed for a professional-quality job.
The aim here isn’t a quick patch-up. It’s about restoring the solid, silent staircase you’re supposed to have. Each of these fixes gets to the root of the problem, so you won’t be dealing with the same issue again in a few months.
That relentless squeak is one of the most common gripes in any house. At its core, the noise is just friction—wood rubbing against wood or a loose nail. Your job is to stop that movement dead.
If you can get to the underside of your stairs, maybe through a cellar or an under-stairs cupboard, you’ve hit the jackpot. This gives you the best chance for a completely invisible and rock-solid fix. The gold standard here is to fit glue blocks. These are small, triangular blocks of wood. You’ll want to slap a generous amount of PVA wood glue on them and wedge them tightly into the corner where the back of the tread meets the top of the riser.
Push each block into place and then drive a couple of screws at an angle through the block into both the tread and the riser. This basically welds the two parts together, creating a rigid joint that kills any chance of movement. Many proven techniques for a safe and silent staircase centre on the effective repair of damaged or weakened wood boards, making sure the structure is sound from the inside out.
Of course, not everyone has that kind of access. If your staircase is boxed in, you’ll have to work from the top.
This diagram breaks down the core repair process, from diagnosis to the final fix.
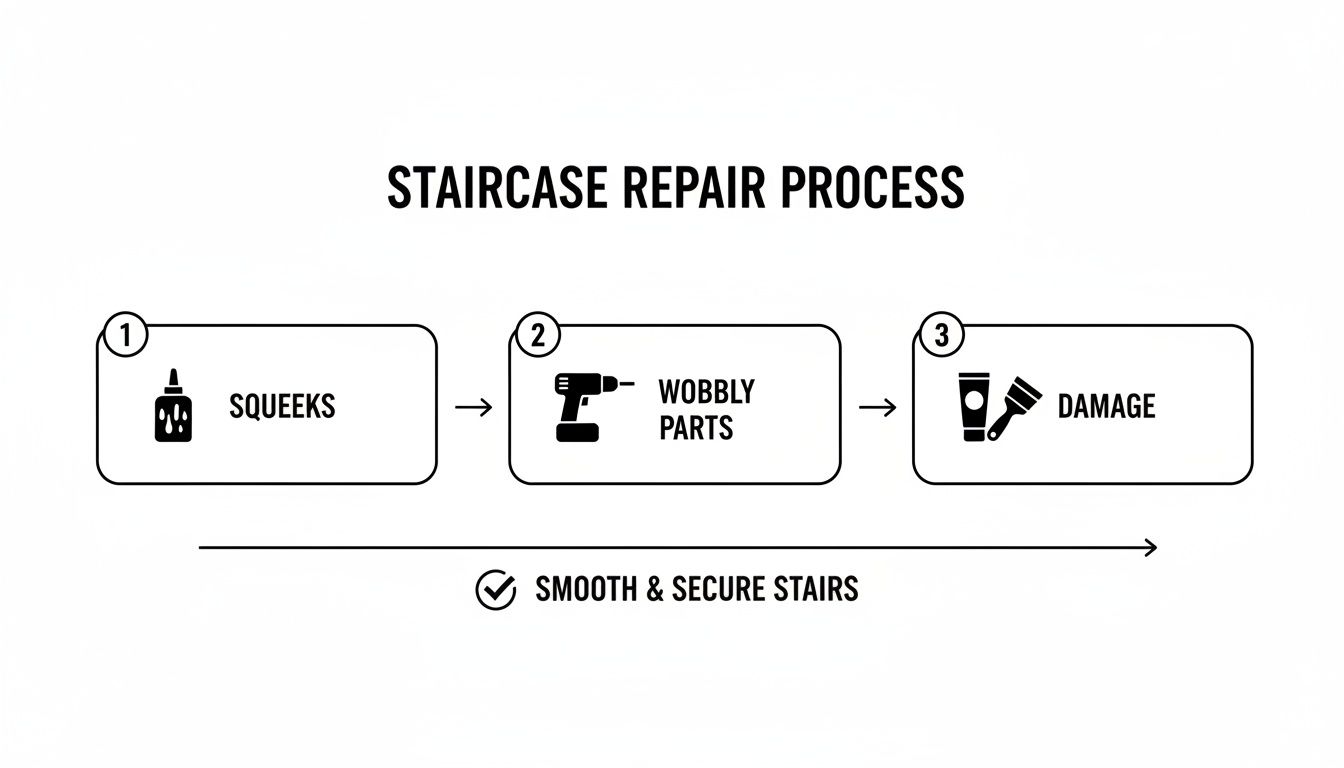
As you can see, whether it’s noise, wobbles, or surface damage, a targeted approach with the right materials is the key to getting it right.
A wobbly newel post isn’t just annoying; it’s a serious safety hazard. This post is the main anchor for your entire balustrade, and if it’s unstable, the whole system is compromised. The fix usually means reinforcing how the post is secured to the floor joists below.
Often, the original lag bolts or screws have just worked themselves loose over time. You’ll need to carefully pull back the carpet and underlay to get at the base of the post. You might find a small trim piece you can gently pry off to reveal the fixings.
Your first thought might be to just crank the existing bolts tighter. That’s a good start, but for a truly permanent, rock-solid fix, you need to add new fixings. Drilling new pilot holes and driving in fresh, heavy-duty lag bolts or structural screws into a solid joist will give you far more stability than relying on old, worn-out holes.
If the wood at the base of the post itself is damaged or has gone soft, you’ll need to sort that out first. Cut away the rotten section with a sharp chisel and fill the gap with a two-part epoxy wood filler. Once that’s cured, it provides a solid new base for your fixings to bite into.
Life happens, and deep scratches, dings, or even cracks can appear on wooden stairs. For minor cosmetic damage, a simple wax filler stick that matches your wood’s colour can work wonders.
For deeper damage, a two-part wood filler is your best bet. It sets incredibly hard and can be sanded down for a perfectly smooth, flush finish. Mix a small amount as per the instructions and press it firmly into the damaged area with a putty knife, overfilling it slightly to account for sanding.
Once it’s fully cured (this could take a few hours), get sanding. Start with medium-grit sandpaper (around 120-grit) to level the filler, then switch to a fine grit (220-grit) to get a silky-smooth surface that’s ready for a new coat of paint or stain.
A broken baluster, or spindle, can ruin the look of your staircase and create a dangerous gap. The good news is you rarely need to dismantle the whole handrail just to replace one.
Start by carefully cutting the broken baluster in half with a hand saw. With the tension gone, you can usually twist and pull the two halves out of their holes in the handrail and the tread. If they’re glued in tight, you may need to carefully drill out the old ends.
Measure the gap precisely and cut your new, matching baluster to size. Most are fixed with a dowel at each end. To install the new one, slot the top end into the handrail first, then tap the bottom end into place on the tread. Secure it with strong wood adhesive and a couple of discreetly placed finish nails driven in at an angle.
In more modern staircases, like those with glass panels, you might be dealing with components like clamps. It’s vital these are perfectly secure for safety. For anyone tackling these kinds of fixtures, understanding the mechanics of a high-quality glass balustrade clamp gives you valuable insight into how a professional, secure installation is achieved.
Fixing a staircase is about more than just silencing a creak or sorting out a wobble. It’s a job that directly impacts the safety of your home, and that means you need to be aware of the UK Building Regulations. These aren’t suggestions; they’re the legal standards that make sure your stairs are safe for everyone, from toddlers running around to grandparents paying a visit.
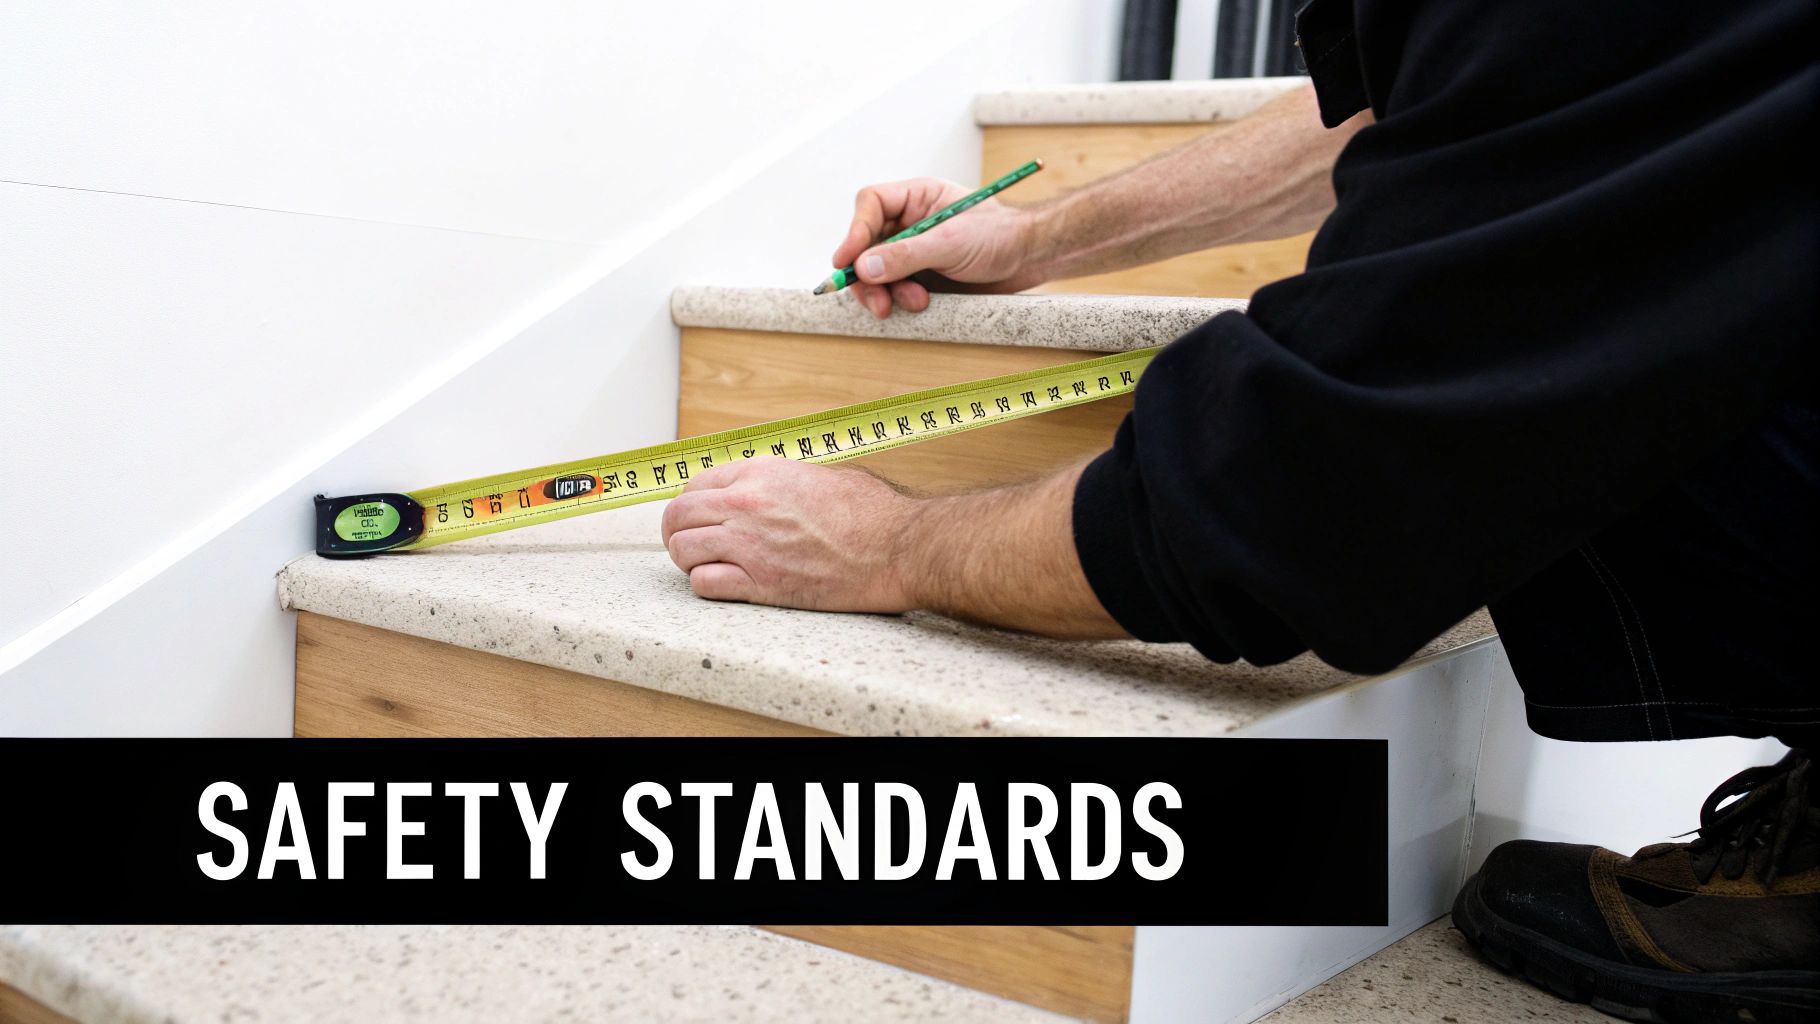
Cutting corners on these rules during a repair won’t just leave your staircase unsafe—it could cause serious headaches if you ever decide to sell your home. Understanding the basics of Part K (Protection from falling, collision and impact) is an absolute must for any homeowner.
The regulations are incredibly specific about the dimensions of a staircase, all to ensure it’s safe and easy to use. You might not be rebuilding your stairs from scratch, but it’s always a good idea to get the tape measure out during a repair, especially if you have a nagging feeling a previous owner’s DIY job wasn’t quite up to snuff.
Here’s what you need to know for a standard domestic staircase:
We often see non-compliant staircases in older homes across the North of England. If your repair job involves replacing several treads, it’s the perfect chance to make sure the new ones meet modern standards. It’s a simple check that brings huge peace of mind.
The rules for handrails and balustrades are just as strict, and they’re all about preventing falls. This is especially critical if you’re repairing a wobbly handrail or replacing individual balusters (often called spindles).
For handrail height, the rules state it must be at least 900mm measured from the pitch line of the stairs (an imaginary line running along the nose of the steps). This height gives proper support for the average adult. For more practical advice, take a look at our guide on how to correctly install stair railings.
Then there’s the famous 100mm sphere rule. This is a simple but vital test: no gap anywhere on your balustrade should be big enough for a 100mm sphere to pass through. It’s designed specifically to stop small children from getting their heads stuck or falling through. If you’re replacing a damaged baluster, always double-check your spacing afterwards.
This laser focus on safety is backed by some pretty stark figures. Research from the British Woodworking Federation (BWF) revealed that nearly 43% of adults have a fall on the stairs each year. Worryingly, around 32% of those incidents are linked to broken safety features or poor maintenance. Following the standards is the most direct way to reduce that risk in your own home. You can read the full staircase safety research from the BWF.
There’s a massive sense of pride that comes from successfully fixing a problem in your own home. But when it comes to staircases, knowing your limits is just as important as knowing how to use a screwdriver.
Lots of minor fixes are well within the grasp of a confident DIYer. However, some problems are more like alarm bells—they signal deeper, more serious issues that absolutely need an expert eye.
Ignoring these warning signs is more than just risky; it can turn a manageable repair job into a catastrophic and expensive structural failure. The real skill is recognising when to put the tools down and pick up the phone.
Certain symptoms go far beyond a simple squeak or a wobbly spindle. These are tell-tale signs of a potential structural compromise, where a botched repair could have genuinely dangerous consequences. If you spot any of the following, it’s time to call in the professionals.
These aren’t cosmetic blemishes. They point to fundamental flaws in your staircase’s stability and, by extension, the safety of your home. Trying to patch them up without the right expertise can hide the real problem or, even worse, make the situation more dangerous.
Calling in a professional isn’t an admission of defeat; it’s a smart, responsible decision. Their expertise provides not just a fix, but a guarantee of safety and compliance—that’s peace of mind you can’t put a price on.
When you bring in a specialist staircase company, you’re getting more than just another pair of hands. You are investing in years of hard-won experience, in-depth knowledge of building regulations, and a genuine understanding of the complex forces acting on a staircase.
A pro can accurately diagnose the root cause of an issue that might not be obvious to the untrained eye. For example, what feels like a wobbly newel post could actually be a symptom of a rotten floor joist hidden beneath it. A specialist has the right tools and techniques to investigate properly without causing more damage.
Crucially, they guarantee that any repair work is fully compliant with UK Building Regulations. This is vital for your family’s safety and for your home’s future saleability. With the UK home improvement sector valued at around £11.2 billion in 2024, it’s clear that homeowners are investing heavily in safe, well-maintained properties. A professional staircase repair is a wise part of that investment.
Sometimes, staircase issues are just one symptom of a much larger problem with your home’s foundation or structure. Large, diagonal cracks appearing in the walls around the staircase, for instance, can be a sign of subsidence or other foundational shifts.
These are complex situations where a staircase specialist might need to work alongside a structural engineer. Issues like these require expert consultation, especially when considering major interventions. Getting a proper grasp on understanding underpinning in construction is a good starting point to see how deep these problems can run.
For any complex repairs, especially those involving structural elements or modern systems like glass balustrades, don’t take the risk. If you’re based in Yorkshire or the North of England and have concerns about your staircase, our team at Binks Glass Solutions is here to help. Contact us for a no-obligation chat and let our experts provide a safe, lasting solution.
Even with a good guide, a few specific questions always pop up. It’s completely normal. Here are some quick, straightforward answers to the queries we hear most often, designed to give you that last bit of confidence before you get started.
This is a classic problem. So many modern homes have the underside of the staircase completely boxed in, leaving you with no access from below. Don’t worry, you can absolutely tackle this from the top.
The first job is to pinpoint exactly where the squeak is coming from. Get a family member or friend to slowly walk up and down the problem step while you get your ear close to the action. Once you’ve located the culprit – it’s almost always where the tread meets the riser – you have a couple of options.
A quick fix is to try working talcum powder or powdered graphite into the joint. It acts as a dry lubricant and can sometimes be enough to silence a minor creak. For a more permanent solution, you’ll want to physically secure the tread to the riser or the stringer below. Using a nail gun with finish nails is ideal. Drive them in at opposing angles to create a really strong ‘clamp’. A tiny dab of wood filler that matches your timber will make the nail heads completely disappear.
That’s a great question, and one we get asked a lot. The simple answer is: you need both. They perform two very different, but equally vital, jobs.
Think of a high-quality PVA wood glue as the thing that creates the real, lasting bond. It chemically fuses the wooden parts together, turning two separate pieces into what is effectively a single, solid unit. This is what truly eliminates the tiny movements that cause squeaks.
Screws, on the other hand, provide the brute mechanical strength. More importantly, they act as the clamp, pulling the two pieces of wood together with immense pressure while the glue cures. This pressure is critical for the glue to form the strongest possible bond. For a silent, bomb-proof repair that will last for years, always use a combination of glue and screws.
Absolutely. It’s a common myth that if one part of a staircase fails, the whole thing needs replacing. This puts a lot of people off from dealing with a problem that’s actually quite manageable.
In the vast majority of cases, you can easily repair or replace a single damaged component. Whether you’ve got one cracked tread, a split riser, or a wobbly baluster, these elements are almost always serviceable on their own.
A full staircase replacement is a huge job, and it’s generally only needed when there’s severe structural damage, widespread rot, or a fundamental failure of the entire structure. Most of the time, a targeted repair is all that’s required to keep things safe.
The UK’s focus on maintaining and upgrading existing properties is clear. In fact, monthly output for repair and maintenance, which includes jobs like this, rose by around 0.4% in March 2025. This shows a healthy demand for keeping our homes in top condition, driven partly by new legislation aimed at streamlining regeneration projects. It’s a reminder that looking after what we have is just as important as building new. You can find out more about how new legislation impacts the UK staircase industry.
If you’ve taken a look at your stairs and realised the job is a bit more involved than you’re comfortable with, or if this has you thinking about a full upgrade to a sleek, modern glass balustrade, we’re here to help.
The team at Binks Glass Solutions has the expertise to make sure your staircase is safe, stylish, and installed to perfection.