
A Practical Guide to Glass Balustrade Installation
A successful glass balustrade installation is built on a foundation of meticulous planning, long before you even think about picking […]

A successful glass balustrade installation is built on a foundation of meticulous planning, long before you even think about picking […]
A successful glass balustrade installation is built on a foundation of meticulous planning, long before you even think about picking up a tool. This is the crucial first step where you sidestep costly mistakes and get everything right from the start. We're talking precise measurements, choosing the right materials to meet safety standards, and matching the system to your home’s unique character.
Getting ready to install a glass balustrade is an exciting prospect, promising to modernise any space. But it’s the groundwork that separates a flawless, professional-looking result from a DIY disaster. Whether you're upgrading a patio in Harrogate or revamping a staircase in Leeds, the principles of solid planning are universal. It’s all about ensuring safety, compliance, and a finished product you can be proud of.
The surge in popularity for these systems isn't just a fleeting trend; it reflects a real shift in modern architectural taste. The UK's glass balustrade market has grown significantly, and for good reason. It’s a testament to an established design culture and a strong renovation market where glass systems are a natural fit for UK building regulations and architectural styles. If you're interested in the data, you can explore more on the frameless structural glass balustrade market to see its trajectory.
Your first proper, hands-on task is a thorough site survey. This isn’t just a quick once-over with a tape measure. It’s about truly understanding the space you’re working with.
For an outdoor patio or balcony, you need to get to grips with the mounting surface. Is it solid concrete? Timber decking? Steel? Each one demands different fixings and might even need structural reinforcement. A classic example is a timber deck – your fixings must anchor into the main joists underneath, not just the top boards, to handle the weight and forces involved.
A proper survey should nail down these points:
With your accurate measurements in hand, you can turn your attention to the materials. This is where you balance the look you want with the safety you need and the budget you have. One of the biggest decisions is the type of glass.
Toughened vs. Laminated Glass: Toughened glass is incredibly strong and, if it breaks, shatters into small, blunt cubes. Laminated glass, on the other hand, is like a glass sandwich – two panes bonded by a plastic interlayer. If it breaks, the interlayer holds the glass in place. For any balustrade protecting a drop, laminated glass is often a legal requirement in the UK precisely because of this superior safety feature.
Next up is choosing the right system. Are you going for a sleek, frameless channel system, a classic post system, or modern standoff fixings? The right choice depends on your desired aesthetic and the structural realities your survey uncovered. Each has its own installation needs, so getting this right ensures you pick a system you can install confidently and, above all, safely.
Before diving in, a quick review of your plan is always a good idea. This simple checklist helps ensure you haven't missed anything critical.
| Checklist Item | What to Consider | Why It's Critical |
|---|---|---|
| Site Measurements | Have you double-checked all lengths, heights, and angles? | Incorrect measurements are the most common and costly mistake, leading to re-orders. |
| Structural Soundness | Is the mounting surface (deck joists, concrete base, wall) solid and level? | The entire system's safety relies on a secure foundation that can handle the specified loads. |
| Building Regulations | Have you confirmed height requirements (900mm internal, 1100mm external)? | Non-compliance can lead to failed inspections and orders to remove the installation. |
| Glass Specification | Have you chosen the correct type (laminated for drops) and thickness for your system? | Ensures the balustrade meets legal safety standards (BS 6180:2011). |
| Fixings & System Choice | Are the chosen fixings appropriate for your mounting surface? | The wrong fixings can compromise the entire structure, leading to catastrophic failure. |
Running through these points is a small time investment that pays off massively, giving you the confidence that you’re ready to build a safe, compliant, and stunning balustrade.
When you’re installing a glass balustrade, getting your head around the UK Building Regulations isn't just a box-ticking exercise. It's the absolute foundation of a safe, legal, and reliable installation. These rules are in place for a very good reason: to ensure your finished barrier offers genuine protection for you, your family, and any visitors.
Getting this part wrong can lead to eye-watering bills for rework, or far worse, a dangerous structural failure.
The key document you need to be aware of is Approved Document K, which covers protection from falling, collision, and impact. It lays out the non-negotiable standards for balustrade safety, and every single installer, whether a seasoned professional or a first-time DIYer, has to follow it to the letter.
One of the most crucial and straightforward rules is all about height. The required height of your balustrade changes depending on where it’s being installed, simply because the risk of a fall varies.
Think of it this way: a sleek glass balustrade for an internal staircase in a Harrogate townhouse would need to hit that 900mm mark. But if that same property has a Juliet balcony looking out over the garden, its barrier must be 1100mm high.
A common mistake we see is people assuming one height fits all. Always, always measure from the finished floor level (or the 'pitch line' of the stairs) to the very top of the handrail to be certain you're compliant.
It's not just about height; your balustrade has to be strong enough to handle real-world forces. Document K is very specific about two types of forces, or 'loads', that the entire system must be able to withstand without breaking a sweat.
The whole system—the glass, the fixings, the base channel, the handrail—must be designed and installed to handle these forces as one complete unit. This is precisely why you can't just pick and mix components and hope for the best; they must be specified and supplied as a fully tested system.
For a deeper dive into the technical details, you can explore our comprehensive guide on glass balustrade building regulations.
The demand for systems that meet these tough safety standards is only growing. The global frameless structural glass balustrade market was valued at an impressive USD 702.6 million in 2025 and is set to grow significantly, driven in large part by the need for stringent compliance in modern construction. You can learn more about these market trends here.
Picking the right glass balustrade system is about much more than just what looks good. It’s a decision that genuinely affects the whole installation process, how much maintenance you’ll be doing down the line, and the final feel of your home or garden. The system is the architectural DNA of your project, defining its character and function.
You'll mainly come across three options: the super-sleek frameless channel systems, the classic post and clamp setup, and the minimalist standoff pin fixings. Which one you go for will depend on the look you want, what you’re fixing it to, and frankly, your own confidence if you’re considering a DIY approach.
To help you get a clearer picture, here’s a quick breakdown of the main systems to help you decide on the best option for your project.
| System Type | Ideal Application | Installation Notes | Defining Feature |
|---|---|---|---|
| Frameless Channel | Modern patios, balconies, and terraces where the view is everything. | Requires a perfectly level and strong base. Precision is critical. | An uninterrupted, seamless wall of glass for a high-end look. |
| Post and Clamp | Decking (timber or composite), internal landings, and garden patios. | More forgiving on slightly uneven surfaces. A versatile all-rounder. | Visible stainless steel posts provide a classic, sturdy appearance. |
| Standoff Pin Fixings | Fixing to the side of staircases or the fascia of a balcony. | Technically demanding; needs a very strong vertical structure to bolt into. | Creates a stunning "floating glass" effect with no visible floor track. |
Let's dive a little deeper into what each of these means for your project.
If you're after that seamless, contemporary look with the absolute maximum amount of glass on show, then a frameless base channel system is tough to beat. The design works by securing the glass panels into a continuous channel that’s fixed to the floor, creating an almost invisible barrier. It’s a hugely popular choice for modern terraces in places like Harrogate or York, where making the most of a beautiful view is the number one priority.
This system delivers a stunning, high-end finish, but it absolutely demands a perfectly level and structurally solid surface to be mounted on. Any dips or imperfections in the base can turn levelling the glass panels into a real nightmare.
The key to a successful frameless installation is precision. That base channel must be flawlessly aligned and secured, as it’s providing all the structural support for the glass. There’s very little room for error here.
The post system is a more traditional and, in many ways, more versatile choice. It uses stainless steel or aluminium posts fixed firmly to the floor, with the glass panels held securely between them using clamps. A big advantage here is that this method is often more forgiving to install on surfaces that aren't perfectly flat, unlike a continuous channel.
Its sheer versatility makes it a great all-rounder. You’ll see it everywhere, from garden decking in Cumbria to internal stair landings in Leeds. The posts add a visible structural element, which some people actually prefer for its classic, sturdy appearance. If you're curious about how these crucial components work, you can learn more about the role of a glass balustrade clamp in holding the panels safely in place.
Here’s why it’s so popular:
For a true "floating glass" effect, standoff pin fixings are the only way to go. With this system, the glass panels are mounted directly to the side of a structural surface—think a staircase stringer or the fascia board of a balcony—using chunky, robust stainless steel pins. The glass doesn’t even touch the floor, creating a breathtaking, ultra-minimalist finish.
This is, without a doubt, the most technically demanding installation. It requires an incredibly strong vertical surface to bolt into, as well as dead-on precision when drilling the holes in both the structure and the glass itself.
Finally, a quick but crucial word on materials. For any system you install outside, especially in coastal areas or exposed locations across the North of England, always insist on 316-grade stainless steel for every single component. It offers far superior corrosion resistance compared to the more common 304-grade, making sure your balustrade stays looking pristine for years to come.
Right, with all the planning, measuring, and system selection out of the way, it’s time to get your hands dirty. This is where your careful prep work really starts to pay off, turning a collection of posts, channels, and glass panels into the stunning, secure feature you envisioned. A successful glass balustrade installation really comes down to three things: precision, patience, and following the right steps in the right order.
This guide walks you through the key stages and shares some of the professional insights our own installers use on projects across Yorkshire and the North. We'll show you the process, highlighting the critical moments where being accurate makes the difference between a decent job and a flawless finish.
Before a single drill bit touches a surface, the first job is always to get the installation area ready. This means making sure the surface is spotlessly clean, completely dry, and free of any dust or debris. It's not just about being tidy; you simply can’t get accurate markings on a dirty surface.
Once it's clear, you need to mark out your fixing points with absolute precision. Grab a spirit level, a chalk line, or even better, a laser level to establish a dead-straight reference line for your balustrade. This line becomes your guide for the entire job.
If you’re fitting a post system, you’ll be measuring and marking the exact centre for each post. For a channel system, you're marking the line where the outside edge of the channel will sit.
Pro Tip: Measure twice, drill once. It's an old cliché for a very good reason. A mistake at this early stage is a nightmare to fix later on, so take your time and double-check every single measurement before you even think about picking up a drill.
With your layout meticulously marked, you can start securing the main structural parts. This is probably the most critical physical step of the entire glass balustrade installation. If your posts aren't plumb or your channel isn't level, getting the glass panels to line up correctly later will be impossible.
For post systems, start with the first post—usually a corner or an end post. Use a good spirit level to make sure it's perfectly vertical on both faces. Secure it firmly with the correct fixings for whatever you're mounting it to, whether that’s heavy-duty bolts for concrete or coach screws for reinforced timber joists. Repeat this for every post, checking your alignment as you go.
For a base channel, the idea is similar, but your focus is on keeping the channel perfectly level along its whole length. You’ll often need to use packers or shims underneath to compensate for any small imperfections in the floor or wall.
This diagram shows the three most common system types you might be installing.
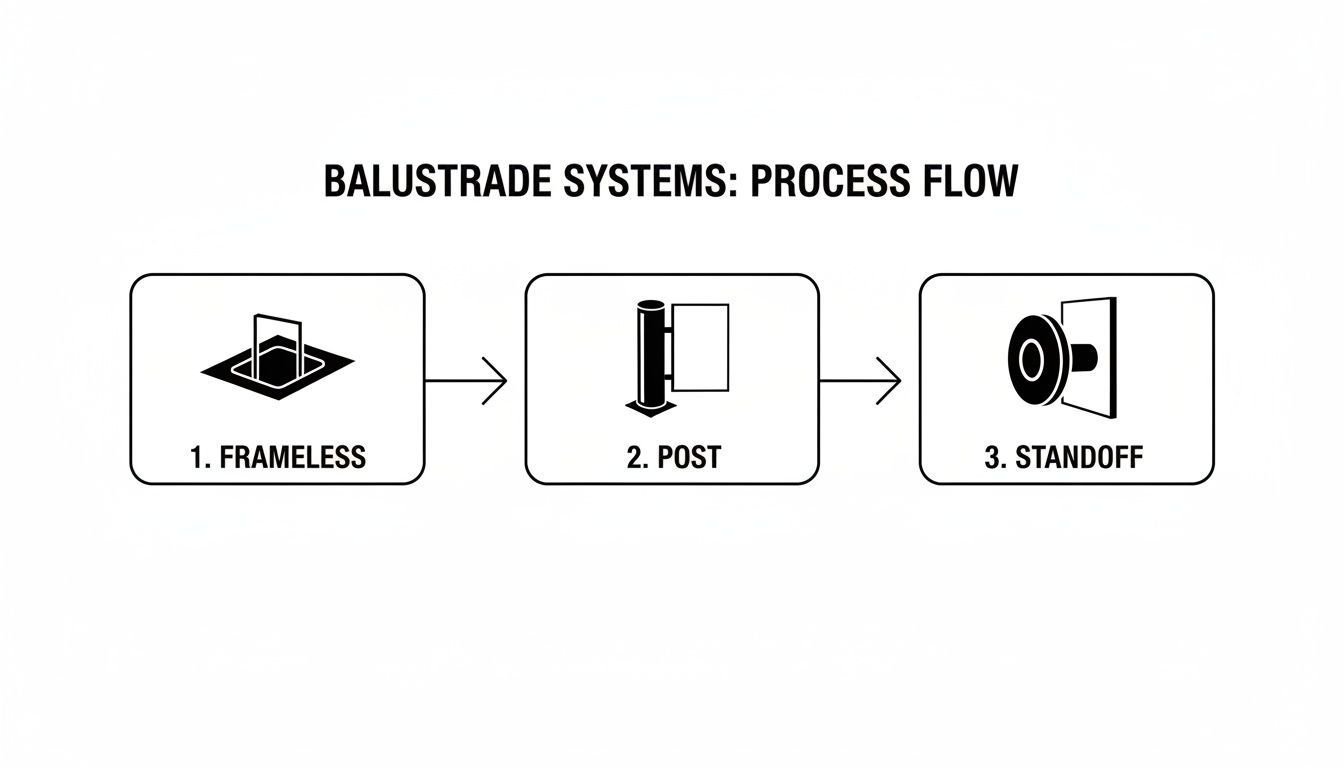
As you can see, the foundational components—the channel, posts, or standoff bolts—form the entire base for the structure long before any glass comes near it.
And now for the main event: fitting the glass. This is a delicate job that needs real care and at least two people—toughened and laminated glass panels are a lot heavier than they look.
Always handle the glass with clean gloves to avoid fingerprints, and use plastic or rubber setting blocks at the base of the channel or clamps. These little blocks are essential; they protect the glass edge and give you a bit of wiggle room for tiny adjustments.
Here's the sequence we follow for a secure fit:
It's vital to leave a consistent expansion gap of 20-30mm between each glass panel to allow for thermal movement. Using plastic spacers is a great way to keep this gap perfect while you work.
Finally, if your system has a handrail, that goes on last. It usually slots neatly over the top edge of the glass with a rubber gasket, which not only gives a comfortable finish but also adds a lot of rigidity to the whole balustrade. Once it's on, give every panel a gentle push to check for any wobble. If it’s solid, you're done.
Let's talk money. Getting a handle on the costs involved in a glass balustrade installation is the first step to a smooth, stress-free project. A realistic budget stops nasty surprises down the line and makes sure your grand vision is actually achievable.
Several key things will nudge the final price up or down, and knowing what they are from the start helps you make the right calls.

Often, the single biggest factor driving the cost is the type of system you choose. A minimalist frameless channel system, for instance, typically has a higher material cost than a classic post-and-clamp system. That's down to the beefier engineering and specialised components needed to achieve that clean, uninterrupted look.
But it's not just about the system. A few other big players will shape your final quote.
When you get a quote from us, you’re essentially seeing a blend of two main things: materials and labour. The materials part is pretty clear-cut, but the labour can change quite a bit depending on how tricky the job is. The expertise of a professional installer is what guarantees a safe, secure, and building-reg-compliant finish, and that’s reflected in the cost.
For a personalised estimate right here in the North of England, online tools can give you a brilliant starting point. Our own Balustrade Calculator is designed to crunch the numbers and give you a tailored quote in minutes, based on your style and measurements.
You can also dive deeper by checking out our detailed guide on the cost of a glass balustrade over on our blog.
Don’t forget to factor in the timeline. From our initial site survey to the final clean-up and sign-off, a typical residential glass balustrade installation usually takes between 2 to 4 weeks. This window allows time for manufacturing your custom-sized glass panels after we’ve confirmed the exact measurements on-site. Planning for this from the start keeps everything running like clockwork.
Even with the best-laid plans, it’s completely normal to have a few questions rattling around before you start your glass balustrade installation. We've pulled together some of the most common queries we get from clients across Harrogate, Leeds, and the wider North of England to give you clear, straightforward answers.
Our goal is to help you feel confident and ready to get your project over the line.
For most projects, the answer is a relieving 'no'. If you're simply replacing an old balustrade or adding one to a ground-level deck, it usually falls under ‘permitted development’ and won’t require you to get planning permission.
However, there are always exceptions. If your property is a listed building, sits within a conservation area, or if the balustrade is for a brand new raised platform or balcony, you absolutely should always check with your local planning authority. A quick call to the council, whether you're in York or Durham, can save you a world of headaches later on.
Keeping your new balustrade looking its best is far simpler than you might imagine. In most cases, a bit of warm, soapy water and a soft microfibre cloth are all you need to keep the glass panels sparkling and streak-free. For the stainless steel bits, a dedicated cleaner will keep that finish looking sharp.
The main thing to remember is to avoid anything abrasive. Steer clear of scouring pads or harsh chemical cleaners, as they can easily scratch the glass or tarnish the metal. After the main installation is done, a professional clean-up is often a good idea; specialised post-construction washing is perfect for getting rid of all the fine dust and debris.
Yes, absolutely—but with one major condition: the deck's substructure has to be solid enough to handle it. This is a crucial safety point. The fixings for your posts or base channel must be anchored directly into the main joists of the deck frame itself, not just the decking boards on top.
We often find ourselves reinforcing a deck's framework by adding extra timber supports, known as ‘noggins’, between the joists. This creates an exceptionally solid mounting point that's more than capable of handling the required loads. Any decent professional survey will always assess the deck's integrity first.
Understanding this is vital for safety. Toughened glass is put through a heat treatment process that makes it about four times stronger than normal glass. If it ever breaks, it shatters into lots of small, blunt, relatively harmless pieces.
Toughened laminated glass, on the other hand, is the next level up. It’s made of two panes of toughened glass bonded together with a strong plastic interlayer. If one of the panes breaks, that interlayer holds all the fragments in place, maintaining a protective barrier. This is exactly why UK Building Regulations insist on it for any balustrade protecting a drop—it offers a superior, non-negotiable level of safety.
Ready to get a clear, no-obligation quote for your own project? The team at Binks Balustrades provides local expertise and tailored advice for homeowners and developers across the North of England. Use our online calculator or get in touch today.